I guess I should be quite ashamed as a beauty blogger, to admit that I've never tried self-tanning products before, I've gotten one spray tan for my 30th birthday party, and part of this is that I feel quite intimated by them, well, truthfully used to feel until I tried the Xen-Tan products:
Xen-Tan Body Scrub R195.00 available online or at these stores *
Product Information:
~ Non-Abrasive Scrub
~ For Face & Body
~ Gentle Mint
~ Prepare skin for lasting self-tan
Scrubbing before self-tanning is probably the most important step, this is suitable for face and body with gentle exfoliating beads with a gorgeous minty scent. I used this thoroughly all over my body and face, I do have very sensitive skin prone to breakouts, and this was gentle enough to get rid of dead skin cells and not aggregate or cause any skin problems, particularly on my face.
Xen-Tan Luminous Gold Gel Weekly Self-Tan in Medium R380 available online or at these stores *
Product Information:
~ Clear Shimmer Gel
~ Light Tropical Scent
~ Paraben-Free
~ Quick-Drying
A decadent looking gold shimmer self-tanning lotion that smells absolutely incredible, think of beach days sipping on an ice-cold pina colada.
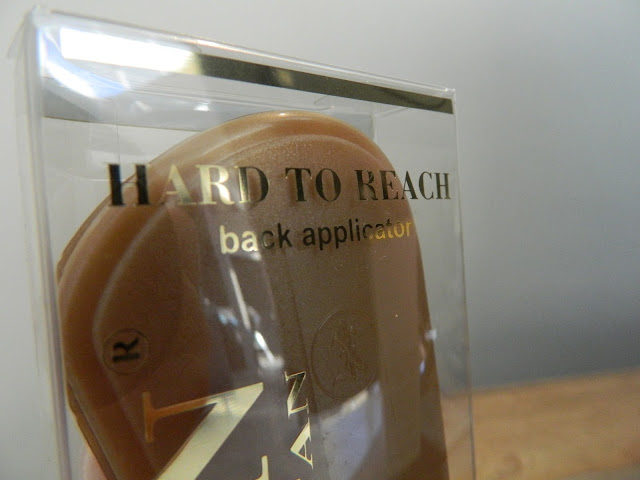
Xen-Tan Hard to Reach Back Applicator for R165.00 available online or at these stores *
Product Information:
~ Tan your back with ease
This is such a handy tool to reach a hard area such as your back, the applicator extends so you will easily reach these areas, plus you get 4 replaceable sponges.
Xen-Tan Delux Tanning Mitt for R56.00 available online or at these stores *
Product Information:
~ Use with mousse, mist or lotion
I would highly suggest that you invest in a tanning mitt, not only does this prevent your hands from staining, but it assists you in creating and applying the self-tan evenly and smoothly. This can be re-used by washing the mitt regularly.
My Experience and Tip and Tricks To Creating a Golden Goddess Tan:
I received these products quite a while ago, and as I mentioned in the beginning of my post, I was so apprehensive trying them. I kept thinking I'll look like a right ol'idiot either being completely orange or looking like an outcast of TOWIE. Needless to say, Xen-Tan have completely put my fears to rest! And to be honest, I am now a complete tan-aholic.
Growing up in South-Africa I'm used to hot sunny weather, when I was younger I used to tan in the sun and on tanning beds often, but as I grew older I realised that I'm being rather foolish and decided to embrace the milky look, but thank goodness I discovered these gems. It's not a myth when someone tells you having a tan makes you feel like a goddess! It truly does, I felt slimmer, healthier and sexy ... and let me tell you, we're all women here right and there's no shame in admitting we all suffer from a bit of cellulite, it looks 100 times better with a golden tan.
Overall my experience with my first ever self-tanning product was amazing! I love Xen-Tan, clearly they're of the absolute best quality and I now understand why they're such a hit amongst fellow bloggers and celebrities alike. They will from now on be a summer staple in my beauty cabinet.
Here's how I did my tan and also a few things I've learned {I do suggest that you set out an evening to prepare and apply self-tanning especially if you're still a novice like me}:
Step 1:
Day Before (Wax) Day Before or Morning (Shaving) - Wax at least a day before, and shave either the day before or the morning of applying your self-tanning.
Step 2:
Morning - Moisturise properly after your bath and shave.
Step 3:
Night - I suggest applying self-tan at night as it's easier to allow that time for the Xen-Tan to develop. Have a bath and do a proper exfoliation of your full body, I cannot stress this enough ... scrub, scrub and scrub ...
Step 4:
Properly dry yourself and then apply a non-oily moisturiser to your feet (including the heel up to your ankle), your knees, elbows, hands with extra attention on your knuckles. Moisturising before prevents these areas to soak up more self-tanning than needed. I also apply a layer of face moisturiser and then wait until it has been fully absorbed.
Step 5:
Taking the mitt, apply a dollop of self tanning directly on the mitt, what I do is divide up my body in areas or sections starting with one leg. I started with the lower leg area (where your calf is), so starting just above the ankle and to just below the knee, working the dollop of self-tanning in even strokes.
I then moved to the upper area of the leg with the same application method. You will see residue on the mitt after each area, and I suggest instead of using more self tanner, use the left over and gently and evenly apply over the foot of the leg you've just done, avoiding the sole of your foot plus the knee and back of knee - so basically using residue on mitt for your feet and knees, reason is that these areas tend to soak up the most self tanning. When you do your feet, make sure that you go in between your toes too.
Step 6:
Time to do your hands! This is probably the trickiest part of all. Apply a pea size amount on a mitt for both hands, then lightly apply just to the top part of your hands, including fingers and in between fingers. A little tip is to rub your wrist together very lightly as if applying perfume to kind of blend the area and not have a solid line, and doing that with the sides of your hands too. Then wash the palms of your hands thoroughly.
Step 7:
Although the instruction doesn't say anything about this being suitable for face, I did apply a pea-sized amount to my face with the mitt, ensure that you apply on your ears, being your ears including your neck. I had no breakouts and woke up the next morning with a lovely golden streak-free tan on my face :)
Step 8:
You will have to wait approx. an hour before the solution dries enough so you can wear a very loose garment. I just wore an old t-shirt from my hubby, and when the solution was dry to the touch I went to bed, during that time it developed fully and I woke up the next day tanned and bronzed. Avoid any activity that will cause you to sweat before the lotion has dried completely, if you do wear clothing or anything before it's dried, you will end up with marks and streaks.
General:
After the gold gel dried, I had gold shimmers all over my body, I was quite concerned wondering if it's going to look like that permanently, however, the next morning after my bath all the shimmers was gone, so I'm assuming they do have properties in them that helps to obtain a golden tan.
As the gel is of a clear consistency, it is quite difficult to see where you have applied the formula, which makes it easy to miss spots, I would suggest if you're a newbie to rather buy a formula that is coloured, which will make it so much easier to notice any missing spots or streaks, as an alternative the Moroccan Tan looks amazing!
I didn't buy a darker shade of foundation, instead I just used a big fluffy brush and bronzer to match my face to my body.
I've had two applications so far, and I think there's gel left for one more application, so I estimate that one bottle is enough for 3 - 4 full body applications.
I started noticing fading after 4 - 5 days, it's important to moisturise as much as possible, moisturised skin doesn't shed cells so quickly, also, I think it's worth investing in a gradual self-tanner or you can mix the gold gel with your moisturiser of choice to create your own, this will help your tan last a lot longer.
No matter how thorough you are in applying this, you will have some small mistakes, the first application I had slight marks on my hands and a missed streak on my calf (not noticeable at all), and the second time my left hand was a bit darker than my right with some streak marks. Here's a few things you can do to fix it:
- Use cutex/nail polish remover or lemon juice (you can also cut a lemon in half) and rub over areas you want lightened, for example the palms of your hands.
- If you have a streak somewhere that is not too noticeable like what I had, take a cotton wool with a tiny bit of self tanning, and rub on the missed area, alternative scrub the area then re-apply.
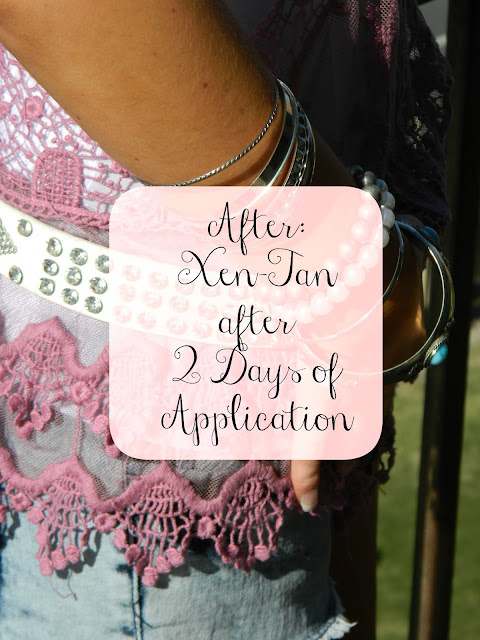
I highly recommend Xen-Tan products, people asked me if I'd been on holiday, the finish is olive toned not orange toned!
I hope my post was helpful to you, please let me know if you have any questions or your own tips and tricks.
Have a fab Monday!


WAUW awesome post i love the time and dedication u put into ure reviews they are amazing everytime
ReplyDeletexxx houseoffstyle
Aww thank you so much it's lovely that you noticed that ;) xoxo
DeleteI am too tan to try a self tanning product ;)
ReplyDeleteLoved the review hun.
Amina ∞ Oh Just One More ∞
Hie hie that's funny babe! But I am jealous because you have a year round tan. Have a fab day xoxo
DeleteGreat review lovely, it's so informative and in-depth! <3 I have never tried Xen-Tan before but I am dying to, they seem like great products! :))
ReplyDeleteAndrea | RosyChicc ❤
Thanks so much hunni glad you found it helpful. Honestly, as a novice I highly recommend them, plus they smell so good yumm! xo
DeleteThorough review! It looks great! There are just so many steps to this to achieve a tan look. The end look though is great.
ReplyDeletehttp://www.averysweetblog.com/
Thanks Kim! I think initially to get to grips with it there's a few steps, but I'm sure the more you do it the easier it becomes :) x
DeleteBlogs that have quality information like this are as precious as gold. You have given me much to think about in this blog. Thank you.
ReplyDelete